
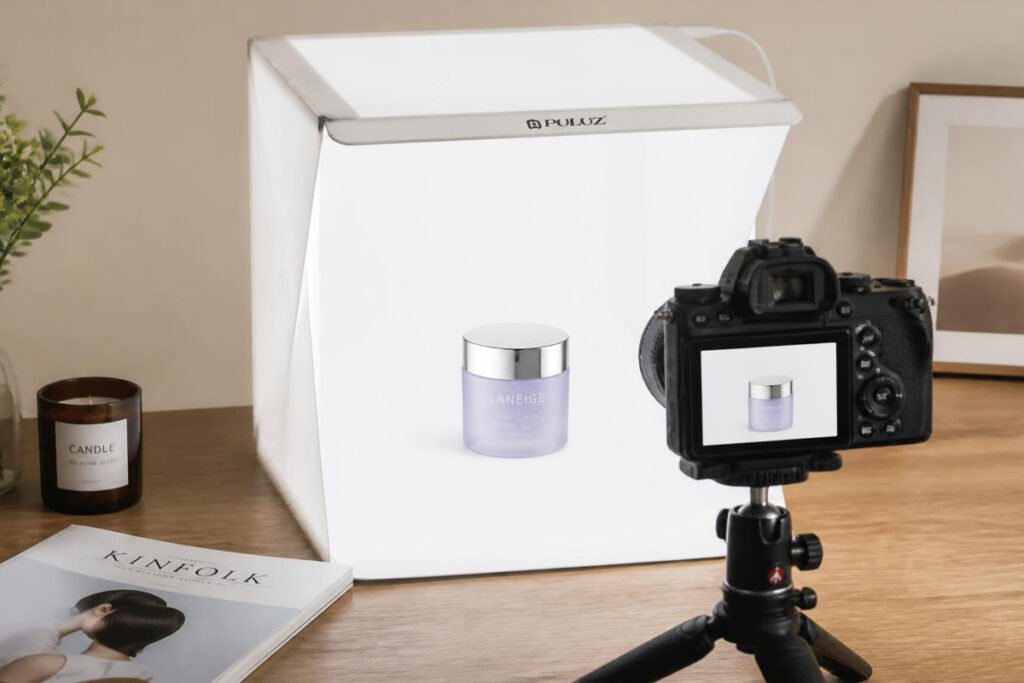
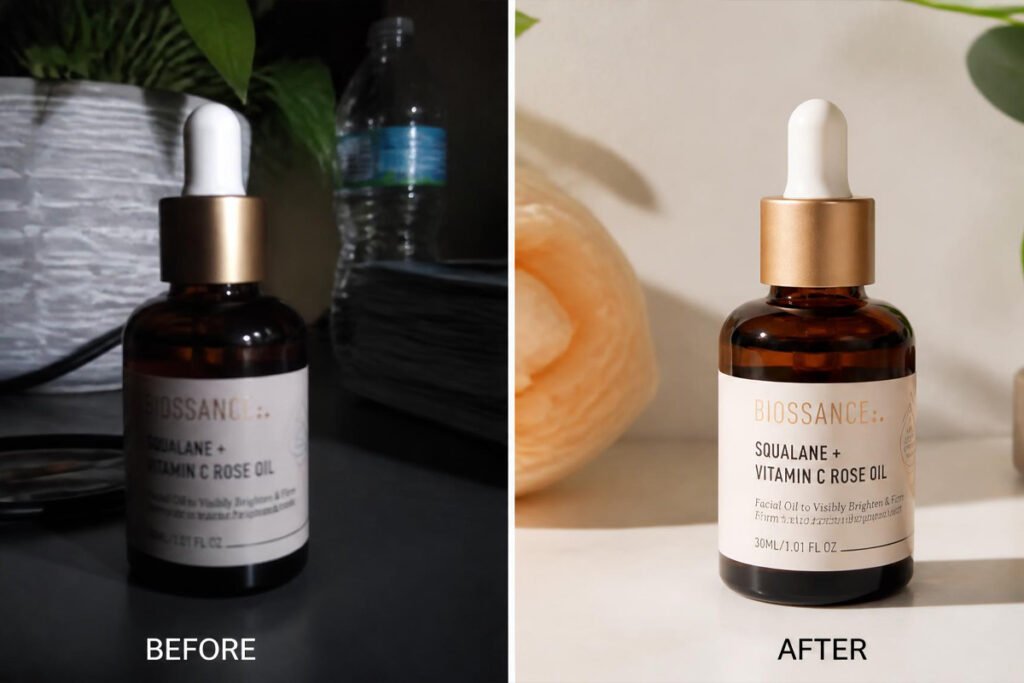
Two listings, identical product, wildly different sales numbers — and the difference isn’t the product at all. It’s the photo. A dim, shadowy phone snap next to a cluttered background loses the sale before a shopper ever reads your description, while a clean, well-lit shot builds instant trust, even for a product that costs exactly the same.
This is one of the most fixable problems for anyone running a dropshipping business, selling on Etsy, or shipping print-on-demand products — and it doesn’t require a professional studio or a photography background to solve. A handful of inexpensive, purpose-built tools close almost the entire gap between amateur listing photos and the kind that make a shopper stop scrolling.
Good photos also do more than just look nice — they directly reduce returns, since a shopper who sees an accurate, well-lit product is far less likely to be surprised or disappointed by what actually arrives, which matters just as much as packing and shipping it correctly once it’s sold.
In this guide, we break down the five pieces of photography equipment worth investing in first, what problem each one solves, and how to build a working setup without spending a fortune.
Quick Answer
The best product photography setup depends on what’s actually wrong with your current photos. If your background looks cluttered or inconsistent from shot to shot, a light box or shooting tent solves that instantly by giving you a clean, repeatable backdrop every time. If your photos look flat or oddly shadowed, a softbox lighting kit fixes the single biggest cause of amateur-looking product shots. If your images come out blurry, especially in lower light, a tripod removes camera shake entirely. A seamless backdrop gives you a professional, distraction-free background for larger items that don’t fit inside a light box. And a simple reflector fills in harsh shadows on the side of the product facing away from your light source. The right principle: fix whichever flaw a shopper would notice first — blur, shadows, or clutter — before worrying about the rest.
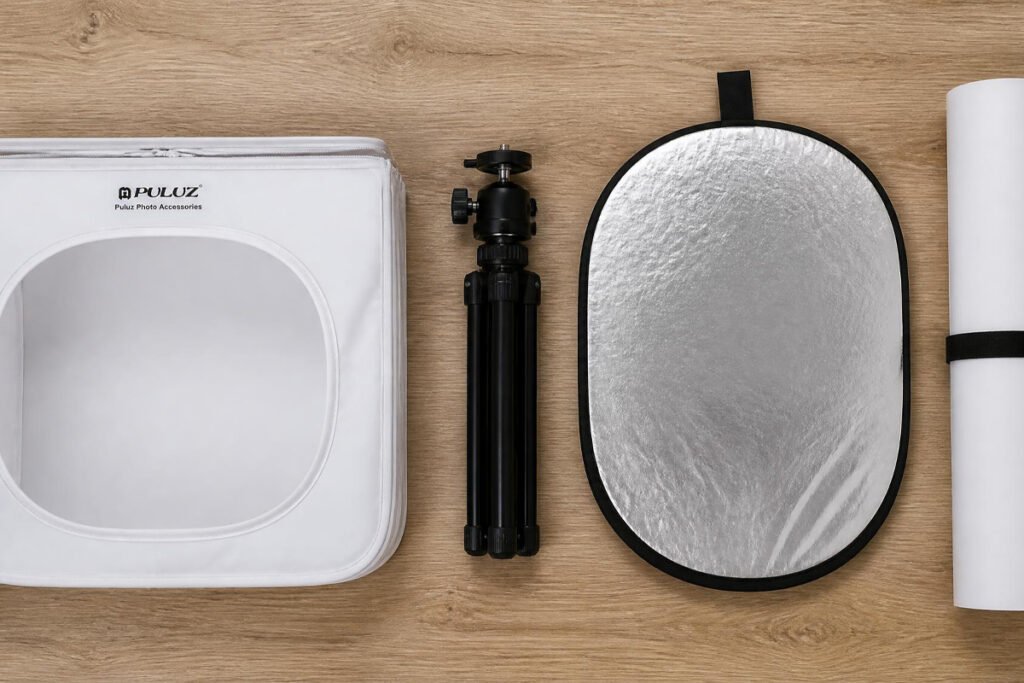
Table of Contents
- Why Product Photos Directly Affect Sales
- How to Choose the Right Gear for What You Sell
- Best Product Photography Equipment Available
- Comparison Table
- Best Setup for Different Types of Products
- How to Shoot Your First Product Photo Set Step by Step
- Common Mistakes
- Expert Tips
- Final Thoughts
- Frequently Asked Questions
Why Product Photos Directly Affect Sales {#what-is}
Online shoppers can’t touch, hold, or inspect a product before buying — photos are doing all the work that an in-person store visit normally would. A blurry, poorly lit, or inconsistent photo doesn’t just look unprofessional; it actively raises doubt about whether the product itself is as good as described, which is often enough to send a shopper to a competitor’s listing instead.
The core photo problems that most directly hurt conversions are:
- Blur, usually from handheld shooting in anything but bright daylight
- Harsh or uneven lighting, which creates distracting shadows and makes colors look inaccurate
- Cluttered or inconsistent backgrounds, which distract from the product and look unprofessional across a full shop
- Inaccurate color representation, which increases returns when the delivered product doesn’t match what shoppers expected from the photo
According to a small business photography checklist referenced by industry guidance, buying a tripod, phone mount, clean backdrop, reflector, and basic lighting first solves the majority of common beginner photo problems — blur, shadows, poor framing, and messy backgrounds — before anything more advanced is needed.
How to Choose the Right Gear for What You Sell {#how-to-choose}
Before buying anything, ask yourself three questions:
How small are your products? Jewelry, cosmetics, and small accessories fit neatly inside a compact light box. Clothing, larger home goods, or multi-item sets usually need a full backdrop and stand setup instead.
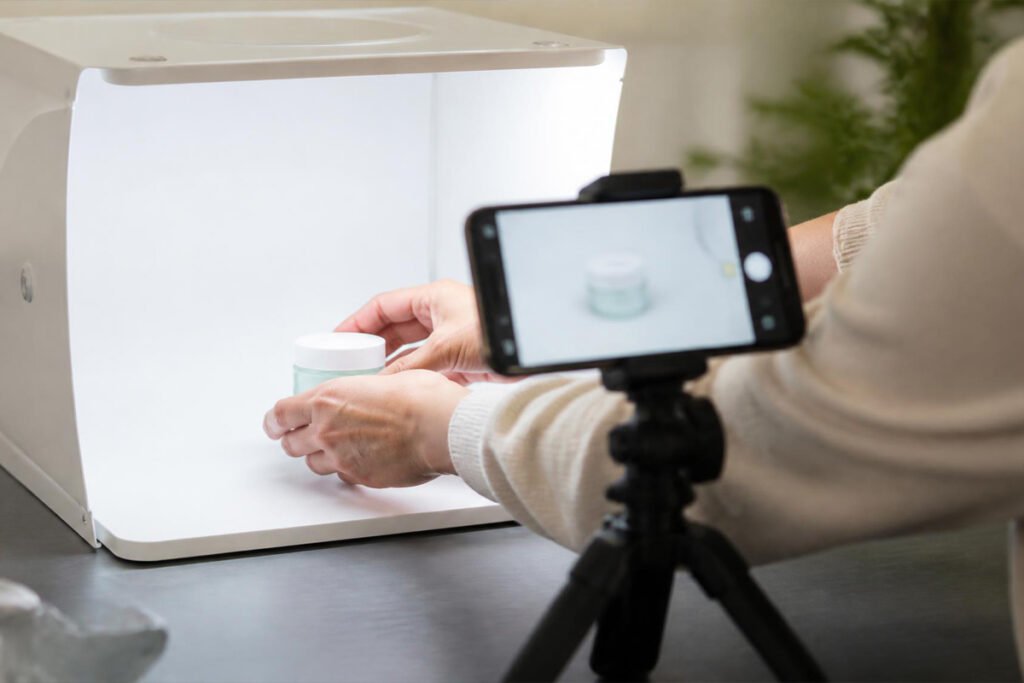
Do you shoot with a phone or a camera? Most modern smartphone cameras are genuinely good enough for online listings when paired with proper lighting and a tripod — you don’t need a dedicated camera to get professional-looking results.
How much control do you want over lighting? A light box with built-in LEDs is the fastest, most consistent option for small items. A separate softbox kit gives more flexibility and works for a wider range of product sizes, at the cost of a slightly steeper learning curve.
Best Product Photography Equipment Available {#best-options}
1. Light Box / Shooting Tent
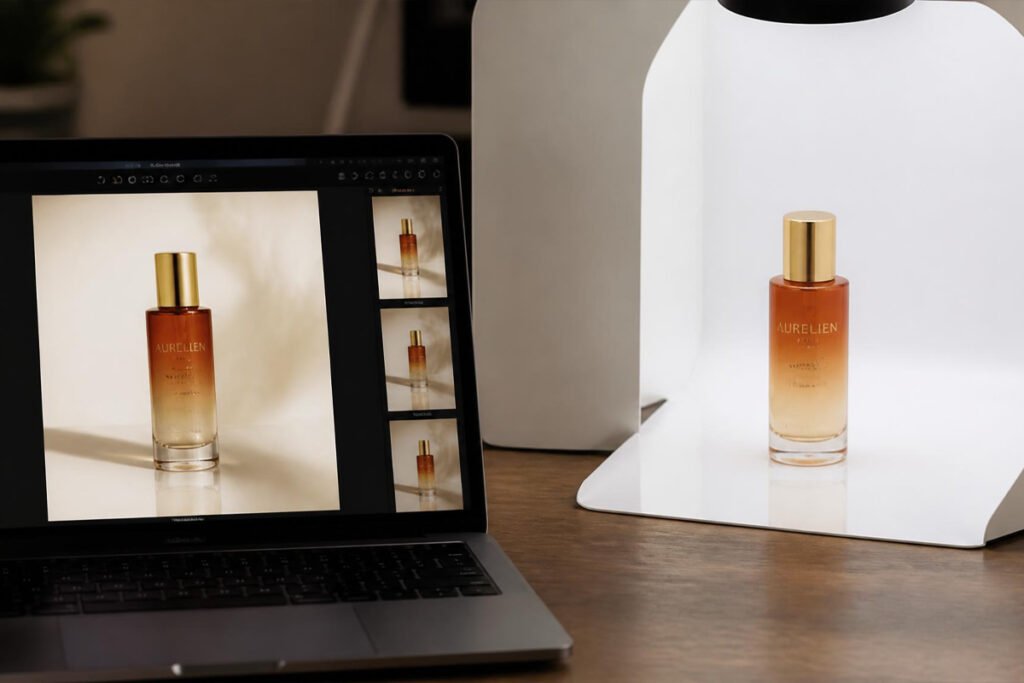
Overview: A light box (also called a shooting tent) is a small enclosed studio with built-in LED lighting and interchangeable backdrops, purpose-built for photographing small products like jewelry, cosmetics, and accessories. It solves lighting, background, and consistency all in one compact, foldable unit.
Key Features:
- Built-in LED lighting with a high color rendering index (CRI 95+) for accurate color representation
- Multiple interchangeable backdrop colors included with most kits
- Dimmable brightness to control shadow intensity
- Foldable, portable design that stores flat between shoots
Best For: Sellers photographing small items — jewelry, cosmetics, small electronics, collectibles — who want consistent results without learning full manual lighting setup.
Pros: ✅ The fastest path to consistent, clean product photos for small items ✅ Built-in lighting removes most of the guesswork around shadows and exposure ✅ Compact enough to set up and pack away in minutes
Cons: ❌ Too small for clothing, larger home goods, or multi-item product shots ❌ Cheaper models can have uneven lighting or lower color accuracy
Our Verdict: For anyone running an Etsy shop selling small handmade goods or jewelry, this is usually the single highest-value purchase on this entire list — one box solves lighting, background, and consistency at once.
2. Softbox Lighting Kit
Overview: For products too large for a light box, a softbox lighting kit provides the same soft, even, shadow-reducing light using two adjustable stands positioned on either side of the product. It’s the standard setup used for clothing, larger home goods, and any product photographed against a full-size backdrop.
Key Features:
- Two-light setup for even illumination from both sides, reducing harsh shadows
- Adjustable stand height and angle to match different product sizes
- Diffused softbox coverings that soften and spread the light source
- Continuous (not flash) lighting, making it easy to see your result in real time
Best For: Sellers photographing clothing, larger home goods, or any product too big to fit inside a light box.
Pros: ✅ Scales to a much wider range of product sizes than a light box ✅ Continuous lighting is beginner-friendly and easy to preview before shooting ✅ Reusable across product photography and basic video content
Cons: ❌ Requires more setup time and floor space than a light box ❌ Slightly steeper learning curve to position lights correctly
Our Verdict: If your catalog includes anything beyond small accessories — especially clothing or larger print-on-demand items — this is the next logical investment after a light box stops being big enough.
3. Tripod with Phone Mount
Overview: Camera shake from handheld shooting is one of the most common and most avoidable causes of blurry product photos, especially in anything less than bright daylight. A tripod eliminates it entirely and, just as importantly, keeps your camera angle and framing consistent across an entire batch of product shots.
Key Features:
- Adjustable height to match different product sizes and shooting angles
- Universal phone mount compatible with most smartphone sizes and cases
- Stable base that won’t tip or drift during longer shooting sessions
- Compact, foldable design for easy storage between shoots
Best For: Anyone shooting with a smartphone camera who has noticed blur or inconsistent framing across their listing photos.
Pros: ✅ One of the cheapest items on this entire list relative to its impact ✅ Immediately eliminates blur from camera shake ✅ Keeps framing and angle consistent across a full batch of product shots
Cons: ❌ Cheap models can wobble slightly under a heavier phone and case combination ❌ Adds a small setup step compared to shooting fully handheld
Our Verdict: If you take nothing else away from this list, a tripod is the cheapest possible fix for the single most common beginner mistake — blurry, inconsistent product photos.
4. Seamless Backdrop
Overview: A seamless backdrop — a continuous roll of paper or fabric that curves smoothly from vertical to horizontal — eliminates the visible line where a table meets a wall, giving product photos a clean, professional, distraction-free background. It’s the standard setup behind most polished-looking product listings for items too large for a light box.
Key Features:
- Continuous roll or panel design that eliminates visible background seams
- Available in multiple colors, with white and neutral tones most versatile for e-commerce
- Compatible with a simple stand system for quick setup and breakdown
- Durable, reusable material that withstands repeated shoots
Best For: Sellers photographing larger products, clothing, or anything shot outside of a light box.
Pros: ✅ Gives a clean, professional background for a wide range of product sizes ✅ Reusable across hundreds of shoots once purchased ✅ Pairs directly with a softbox lighting kit for a complete larger-item setup
Cons: ❌ Requires a stand system and more physical space than a light box ❌ Paper backdrops can wrinkle or tear with heavy use over time
Our Verdict: Pair this with your softbox lighting kit rather than buying it alone — the two solve the same “larger product” problem from different angles and work best together.
5. Reflector
Overview: Even with good lighting on one side, products often end up with a visible shadow or dark side facing away from the light source. A reflector — a simple, foldable panel that bounces light back onto the shadowed side — fills in that gap for a small fraction of the cost of adding a second full light.
Key Features:
- Foldable, collapsible design for compact storage between shoots
- Multi-surface options (white, silver, gold) for different lighting effects
- Handheld or stand-mounted use depending on your setup
- Lightweight and easy to reposition mid-shoot
Best For: Anyone using a single light source — including light box setups — who notices one side of their product consistently looks darker or shadowed.
Pros: ✅ One of the cheapest tools on this entire list ✅ Immediately fills in shadows without needing a second light source ✅ Compact enough to keep on hand for every shoot
Cons: ❌ Requires either a free hand or a separate stand to hold it in position ❌ Effect is more subtle than adding genuine second-side lighting
Our Verdict: A small, inexpensive addition worth keeping in your kit regardless of which other equipment you buy — it’s the cheapest fix for the shadow problem almost every single-light setup runs into.
Comparison Table {#comparison-table}
| Equipment | Best For | Relative Cost | Best Product Size | Setup Time |
|---|---|---|---|---|
| Light Box / Shooting Tent | Consistent all-in-one small product setup | Low–Moderate | Small (jewelry, cosmetics) | Very Low |
| Softbox Lighting Kit | Even, professional lighting for larger items | Moderate | Medium–Large (clothing, home goods) | Moderate |
| Tripod with Phone Mount | Eliminating blur, consistent framing | Very Low | Any size | Very Low |
| Seamless Backdrop | Clean, distraction-free background | Low–Moderate | Medium–Large | Low–Moderate |
| Reflector | Filling in shadows on a single-light setup | Very Low | Any size | Very Low |
Prices vary by brand and kit size — compare current listings against your specific product catalog before buying.
Best Setup for Different Types of Products {#use-cases}
Jewelry, Cosmetics, and Small Accessories
If you’re photographing small items, a light box alone solves most of your problem in one purchase — add a reflector if you notice consistent shadowing on one side, which is especially common with reflective items like handmade jewelry sold on Etsy.
Clothing and Larger Home Goods
If your catalog is mostly apparel or larger items, invest in the softbox lighting kit and seamless backdrop together rather than trying to force a light box to work — these two tools are built specifically for the size range a light box can’t handle.
Mixed Catalogs (Dropshipping and Print-on-Demand)
If you’re sourcing or printing a wide range of product types, a tripod and reflector are worth buying first since they’re useful across every product size, before deciding whether a light box or full backdrop setup fits your specific catalog better.
How to Shoot Your First Product Photo Set Step by Step {#how-to}
Step 1: Choose Your Setup Based on Product Size
Small items go in a light box; larger items go on a backdrop with softbox lighting. Don’t try to force one setup to handle both.
Step 2: Mount Your Camera on a Tripod
Set your phone or camera at a fixed height and angle before shooting, and keep it consistent across your entire batch for a cohesive-looking shop.
Step 3: Position Your Lighting
For a light box, this is largely done for you. For a softbox setup, position both lights at roughly equal distance and angle from the product to avoid uneven shadows.
Step 4: Add a Reflector if Needed
Take a test shot and check for shadowing on the side facing away from your light source — add a reflector on that side if the shadow looks distracting.
Step 5: Shoot Multiple Angles and Review Before Editing
Capture the product from several angles in the same session, then review all shots together before editing — this catches inconsistencies you won’t notice looking at photos one at a time.
Common Mistakes {#mistakes}
Shooting handheld instead of on a tripod. Even a slight hand tremor causes noticeable blur, especially indoors — this is one of the most common and most easily avoidable causes of amateur-looking listing photos.
Using harsh, single-direction lighting without a reflector or second light. A product lit from only one side often ends up with a distracting dark shadow on the other, which a five-dollar reflector fixes almost entirely.
Changing your background or lighting setup between shoots. Inconsistent backgrounds across a shop look unprofessional and undermine the trust a shopper builds while browsing your listings — pick one setup and stick with it across your whole catalog.
Expert Tips {#tips}
Shoot in natural daylight near a window if you don’t have artificial lighting yet. Indirect natural light is often more flattering than a single harsh overhead bulb, and costs nothing while you’re deciding what equipment to invest in first.
Keep your background completely consistent across your shop. A cohesive-looking catalog builds more trust than any individual “perfect” photo — consistency matters more than any single shot being flawless.
Edit lightly, not heavily. Small adjustments to brightness and color accuracy are fine, but heavy editing that shifts a product’s actual color increases returns when the delivered item doesn’t match the listing photo.
Final Thoughts {#final-thoughts}
There’s no single piece of equipment that fixes every product photo problem — only the right combination for what you actually sell. If your products are small, a light box alone solves most of the problem in one purchase. If they’re larger, a softbox kit and seamless backdrop together are the standard setup worth building toward. And regardless of product size, a tripod is the cheapest, highest-leverage fix available for the single most common beginner mistake.
Whichever piece you start with, remember that your product photos are doing the selling your customer can’t do in person — a detail worth as much attention as how you package and ship the product once it sells.
Frequently Asked Questions {#faq}
Do I need a professional camera, or is my phone good enough? For most online listings, a modern smartphone camera is genuinely sufficient when paired with proper lighting and a tripod — a dedicated camera becomes worth considering only once lighting and stability are no longer your limiting factor.
Light box vs. softbox kit — which should I buy first? It depends entirely on your product size. A light box is the better first purchase for small items like jewelry or cosmetics, while a softbox kit is necessary for clothing or anything too large to fit inside a light box.
How much should I budget for a basic product photography setup? A tripod, reflector, and either a light box or a simple softbox kit cover the vast majority of common photo problems — start with the tripod and reflector since they’re useful regardless of which lighting setup you choose next.
Why do my photos look washed out or the wrong color? This is often caused by mismatched lighting color temperature or auto white balance struggling in mixed light — a light box or softbox kit with a stated high CRI rating significantly improves color accuracy.
Do I need a light box if I already have good natural light? Not necessarily — natural window light can work well for many sellers, but a light box provides consistency regardless of time of day or weather, which matters if you’re shooting regularly.
Can I use the same setup for video content, not just photos? Yes — a softbox lighting kit and tripod both work well for short product videos in addition to still photos, making them a reasonable dual-purpose investment.
How many product angles should I photograph per listing? Most successful listings include at least three to five angles, including a straight-on shot, a detail close-up, and a scale or context shot showing the product’s real-world size.
Do reflectors actually make a noticeable difference? Yes — even a simple white reflector meaningfully reduces harsh shadowing on a single-light setup, and it’s one of the cheapest tools available for the impact it has.
What background color works best for most online marketplaces? White or neutral gray backgrounds are the safest, most versatile default, since most marketplaces either recommend or require a clean, non-distracting background for primary listing images.
How often should I reshoot my product photos? Reshoot whenever you notice inconsistency across your catalog, upgrade your equipment, or add a new product line — otherwise, a consistent, well-lit set of photos doesn’t need frequent updating just for the sake of it.
Author: Morne Winston Last Updated: July 2026